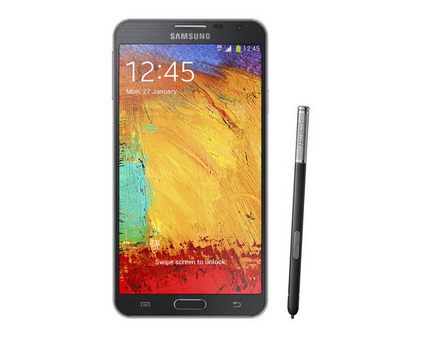
Hello everyone, today tutorial is about root Galaxy Note 3 Neo.We offer step by step guideline to root your Galaxy Note 3 Neo. Now we will use the Chainfire’s CF-Auto Root method for its rooting.
The Galaxy Note 3 Neo is a less costly yet close-to alternative for the Galaxy Note 3. It was unveiled in February 2014 for Note fans who have a tight hand her pockets, yet are provided with something that is so close to the Galaxy Note 3. It is different from the Note 3 in a several aspects like the battery capacity is a tiny bit low, 0.2” screen-size differ, a 1.7 GHz Exynos processor with 2GB RAM & a 8 Megapixel Camera.
The newest version of TWRP recovery is now available for the Neo officially and can be flashed with ease utilizing the Odin Flashing Tool. Inthe future, the SuperSU binaries flash-able zip file may be flashed from the TWRP recovery by itself, hence rooting your current ROM. You can then both stick to your stock rooted ROM or flash any supported Custom ROM, System Tweaks or Kernel .
Warning:
- Rooting & Installing a Custom Recovery voids system warranty. This guideline is only for the Galaxy Note 3 Neo,only carry on if you understand the risk. Softstech or any of its group members shall not be held liable for any damage to your device.
- In case your device is KNOX enabled, rooting & flashing will trip your KNOX meter.
Prerequisites:
- Charge your device above 60% battery life
- Data backup everything including storage, Contacts, SMS, Calenders etc.
- Install Samsung USB drivers
- Enable USB Debugging
- Setup ADB on your PC
- Download the Odin Flashing Tool v3.09, after downloaded extract the zip file to the desktop so you will have Odin3
- Download the required files package containing all the important files and extract it to the desktop, so you will have a folder titled DV on the desktop: DV.zip
Install TWRP on Samsung Galaxy Note 3 Neo :
1) Download the TWRP Odin Flash-able file : open-recovery-twrp-2.7.0.0-hlltexx.img.tar
2) Navigate to the Odin3.09 folder on the desktop & double-click Odin3.09 V3.09.exe to run the tool.
3) Be sure Auto Reboot & F. Reset Time are already checked out, if not then select them. Anything else must be unchecked.
4) Power off your device. Press Volume Down, Home & Power buttons altogether until you see a warning message on screen. So Press the Volume Up button to confirm and boot into Download Mode.
5) Link your Galaxy Note 3 to the PC using a USB data cable.
6)The Odin window will show an Added!! message and the acquired ID:COM port.
7) Press on the AP button, browse to the openrecovery-twrp-2.7.0.0-hlltexx.img.tar & choose it.
8) To initiate the flashing process, Press on Start button.
9) It’ll take a few seconds to complete & So your Note 3 Neo will reboot automatically into OS.
To confirm whether TWRP has been installed successfully, power off your Note 3 Neo. Click Volume Up, Home and Power keys simultaneously until you see the recovery screen.
Root Galaxy Note 3 Neo:
The Note 3 Neo could be rooted simply using Chainfire’s CF-Auto-Root. Check out the development thread for an in-depth details about it.
1) Free Download the CF Auto-Root package for the Galaxy Note 3 Neo SM-N7505: CF-Auto-Root-hllte-hlltexx-smn7505.zip
2) Extract the downloaded zip file CF-Auto-Root-hllte-hlltexx-smn7505.zip and you’ll have all the needed files.
3) Double-Click on Odin3-v3.07.exe to begin the Odin Flashing Tool
4) Be sure Auto Reboot and F. Reset Time are looked at and anything else is not.
5) Power off your Galaxy Neo. Click the Volume Down, Home && Power keys, a warning message will be shown, press the Volume Up key to confirm & boot into Download Mode.
6) Connect the device to the Computer. The Odin window will show the corresponding ID:COM port.
7) Simply click on the PDA tab and choose the CF-Auto-Root-hllte-hlltexx-smn7505.tar.md5.
8) Now, just click on Start to begin with the flashing process.
After completed, the device will reboot itself into a Rooted Neo. To look at and confirm that the rooting was a success, Install the following App & run It.
Enjoy your Rooted Samsung Galaxy Note 3 Neo or Install Custom content on your device using the TWRP recovery. If you Have any questions? Comment below.
